Wednesday, 7 November 2012

Button up - it's cold outside

Humphrey looks so cosy in his duffel coat

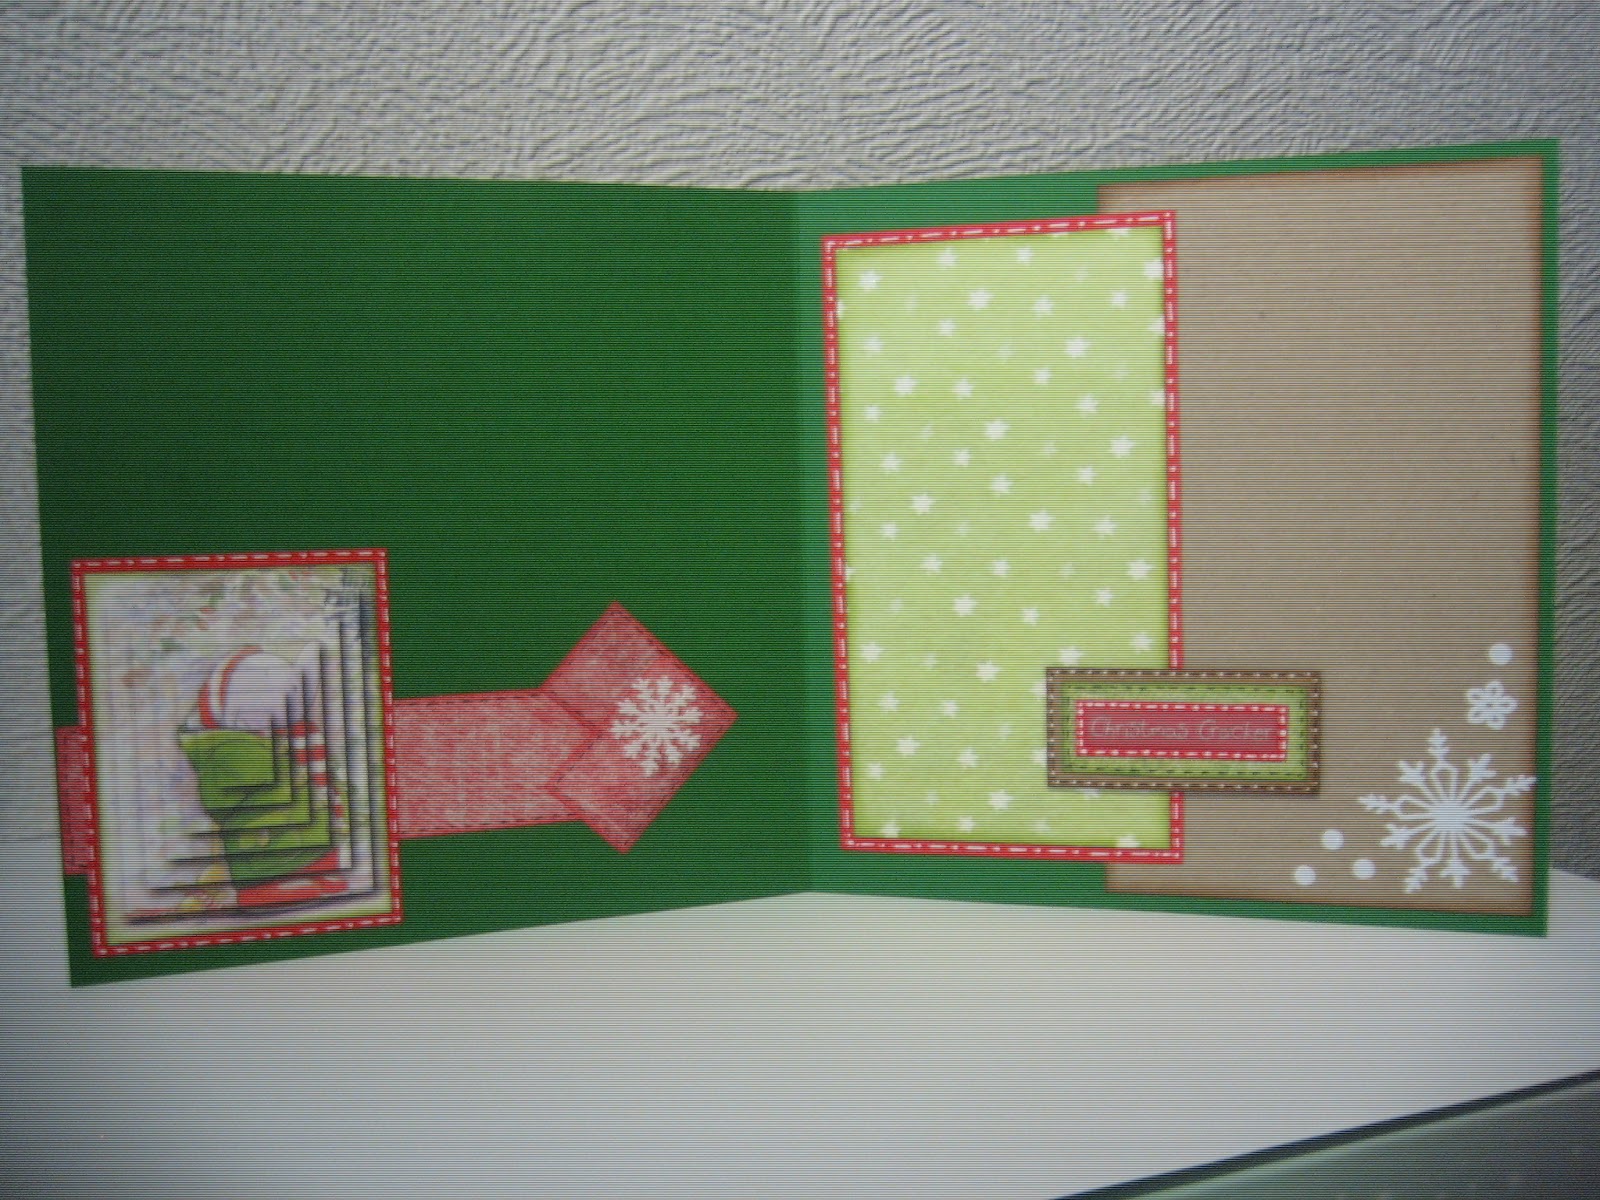
Using up scraps to decorate the inside of card
Update: Mr Fantabulous Mayhem has a day off work today (he works shifts).  I had hoped to do lots of practical things in the home today with his assistance but it just hasn’t happened, and I’ve not got much crafting done either!

Inspiration:  I was reading on facebook about a friend taking his wee boy to a fireworks display and this image came to mind.  I know it’s an elephant but it makes me think of being wrapped up warm when I was a child and again when I did it with my children.  I am a bit of a big softie when it comes to art work that evokes memories.
  • Products: This topper and the paper on the front of the card were part of the free gift in the Crafter’s Companion Inspiration magazine.  It’s from the Humphrey’s corner range and has a lovely hand drawn feel.  Kraft card and red card from stash; the green starry paper on inside is from the Papermania Henbury Lane collection; glossy accents; glamour dust; the chunky red and white twine is by Papermania; snowflake stickers from daisy and dandelion range.
  • Techniques: Mats and layers, pyrimage(? not sure of spelling) and faux stitching and a jaunty angle thrown in.  I’ve added the glamour dust on the frosty leaves and spider’s web with a Quickie glue pen by Sakura.  There is a touch of glossy accents on his wellies and the berries in the background.  Snowflake stickers added randomly.  I’ve curled the edges of some of the backing paper for something a bit different.  I have been trying to use up little bits of card and paper by decorating the inside of cards as I go.
  • Favourites: Kraft card; 8” by 8” card; inked edges; faux stitching; extra details inside card.
  • Extra bits: Buttons (from an old cardigan) with a knot in the red and white twine, stuck on with 3D glue gel.  I sometimes like twine to unravel but this time I wanted a tidy knot so I put a tiny touch of PVA glue on the ends o stop fraying.

Watch this space: I’ve got a card to share tomorrow that has nothing to do with December.


Monday, 5 November 2012

Work in Progress 2

My work in progress sparkles
I'm afraid it's another work in progress day from me.  I've got three shepherds, a gingerbread man, an elephant in a duffel coat and lots of litte creatures from Mulberry Woods all lining up for their big moment just needing a little something or other.

Last night I sat down to Downton Abbey and did some inking edges and adding stickles to the Mulberry card kit from Crafter's Companion.  I am trying to get a bit of a production line going for the December event but still want to add a little bit extra.

The kit is lovely quality but being me I wanted to make each card a little bit different so I have a few ideas but haven't yet got it done.  I'll share when I get my act together. Meanwhile I've got a lovely tray of sparkliness to share.

Sunday, 4 November 2012

Queen for the Day

Old Photos on envelope and Queen for the Day on card front

Inside of card with Kanban bits and hand written journaling
Update: I’m having a bit of a duvet day today, doing some preparation for December cards (cutting pips and inking edges).  That doesn’t make a very interesting blog post so I thought I would share a card I made in the summer that I am particularly fond of.

Inspiration: As part of Elizabeth II’s coronation celebrations, my mother in law was crowned the Queen of the Gala in her local town (Clackmannan) when she was twelve.  She is having a tough year so we wanted to make a bit of a fuss of her for no particular reason.  So at the time of Elizabeth’s Jubilee celebrations I made a Queen for the day card and we got her some treats.  The card borrows from scrap booking quite a bit with some old photos of the crowning ceremony, unfortunately the photos we had were not very clear but there is bunting and they have a lovely vintage feel.  Can you see the horse and cart that has been decorated as her carriage?  I think it’s so romantic.
  • Products: Kanban Cool Britannia/Jubilee kit; 8” by 8” kraft card blank (I love kraft card but I think it works particularly well with the vintage photos); some paper and ‘Queen for the day’ stamp from ‘Simply Homemade’ magazine; red card from stash; some bling and butcher’s twine from stash.
  • Techniques: The toppers and background card from Kanban did most of the work for me setting the scene.  The bunting ties in nicely with the bunting in the background of the old photos.  I’ve framed the photos with some red card and some dots and dashes.  I’ve added some hand written journaling.  I understand from the TV tips by Mel Heaton and Rosemary Berry that this is very important in scrap booking.  As yet I have not done a 12” by 12” scrap book page (that will be changing soon though), but I really like making personalised cards like this.  My husband is a very typical Scottish man and doesn’t do talking about feelings, so in a way this is a gift to him too, to express the feelings he can’t say himself.
  • Favourites: Kraft card; faux stitching; extra details inside card and matching envelope.
  • Extra bits (I love extra bits): Bling here, there and every-where.  I’ve coloured the union jack in the background of one of the photos.  Clever people can do this sort of thing digitally but I just did it with a red pen and a blue pen.  I like this sort of effect.
Watch this space: Trying to alternate between December cards and other requests.

Saturday, 3 November 2012

Snow Blizzard


This wee man looks just like my son aged three.

work in progress - stickles + glossy accents added to die cut greenery looks like frost and makes shapes stronger
Update: Going out tonight so I better get a move on.

Inspiration: I was drawn to this image because of the colours and the little boy’s happy face.  It was only when I got it home and started working with it that I realised I have a photo of my son building a snowman aged about three in a very similar looking snow suit.  He was so cute.  I would share the photo but the 29 year old man he grew into would kill me!  Perhaps you can see something in every-thing if you look long enough or perhaps my wee boy was way at the back of my mind and that is why I was drawn to the decoupage sheet.
Products: 3D decoupage sheet by Craft Creations Ltd ; backing papers from Papermania Henbury Lane collection; plain card from stash; stepper card from my local shop ‘Craft-ed Creations’.

Techniques: Decoupage layers done with foam tape (I ink the edges first is that a bit OCD?); bit of colour added with backing papers; image highlighted with glossy accents on helmet (and faux buttons at side).  Stickles and polar white flower soft for snow.  I got a bit carried away with the snow so it turned into a bit of a snow blizzard.  I re-enforced the steps with a little card bridge underneath (not seen).
Favourites: Inked edged; layers; faux stitching in black (papermania permanent pen) and white (sakura gel pen).

Extra bits (I love extra bits): Used my new Marianne die LR0126 to make little sprigs of Christmas tree.  I’ve added stickles to look like frost and a few berries (from Chloe’s stamps) and stuck it on with a blob of Collall 3D glue.
Watch this space: more Christmas to come and a few Anniversary cards requested.  Sorry the picture could be better.

Friday, 2 November 2012

More Beatrix Potter

More fun in the snow
Taking a short cut with the blog today so that I can do more crafting.  This is another ‘work in progress’ to add to the ‘done’ pile.  I’ve added the snow flake this morning.  Details are very similar to last night’s late post about Peter rabbit.  Done this one with a bit of a jaunty angle.

Ok crafting…here I come...

Thursday, 1 November 2012

Peter Rabbit - Cuddles from Mummy

Nothing better than a big warm Mummy cuddle
Update: Stayed up too late last night watching scary movies, then couldn’t get to sleep…this morning inspired by a new month I tried to tackle my ‘work in progress’ mountain.  Top of my list was cutting out snowflakes to add to quite a few projects.

Inspiration: Peter Rabbit who reminds me of holidays in the Lake District.  I also love the story of Beatrix Potter who made a life for herself following her passion in a time when women were expected to know their place.  This particular image is a favourite of mine because it looks like a really good warm mummy cuddle.
Products: Crafter’s Companion/Hunkydory (A Winter’s Tale kit) Peter Rabbit topper; Joanna Sheen gingham paper; Kanban Kandy Kore card; Holographic card from stash; white lace & border peel offs from stash; brad (WH Smith January sale); Spellbinders Snowflake die.

Techniques: Lots of mats and layers with main topper raised with 3D foam pads; Kandy Kore card embossed and sanded; edges distressed with Tim Holtz tool; used the waste from the white peel-offs to add extra snow.  I tried to follow Mel Heaton’s scrap booking tip for the colours to mat and layer with so my first layer behind the topper is the colour of the rabbit fur so that your eye is drawn to the rabbits rather than Peter’s jacket or the scenery (this may be an old tip but it was new to me).
Favourites: inked and distressed edges.

Extra bits (because where’s the fun in making your own cards without adding extra bits: Spellbinders snowflake cut from different shades of core’dinations Core couture card, plus brad.  I’ve stuck it on with a good blob of Colall 3D glue so that is sits over the topper.
Watch this space: Mr. Fantabulous Mayhem has promised that I will have a working printer soon.  I hope so as there are loads of projects it could help with, including a matching insert for this card and the Funky Hand challenge.  Meantime, I’m going to wrap up warm and play at Christmas (I have a lot of work in progress to finish).


Wednesday, 31 October 2012

Seven Birthday Wood Nymphs

Happy Birthday to Crafter's Companion


A card that can be transformed into bunting

A close up of the Toread called Flora

Happy Halloween every-one!  Busy, busy…hubby is actually hanging up skeletons around me as I type and we don’t even have little ones in the house!

I tried to come up with something different with this project.  I fancied entering the Crafter’s Companion 7th Birthday Competition (with a bit of luck I may even be considered for a guest design team spot).  I thought it would be good to do something with a bit of a wow factor.  I was also looking for an excuse to play with the Toreads (wood nymphs) stamps because of their cute and cheeky little faces and to practice my colouring in.
I had a ball with the colouring in, doing some natural colours and some more unusual.  I will definitely be creating other projects with these stamps as they could be used in many different ways.  I stamped with rich cocoa memento ink on Neenah card and used copic pens to colour in.  I added some highlights with my trusty sakura white gel pen (I would be lost without it) and a Kuretake very fine brown pen.  I added freckles just because I felt like it, not sure if wood nymphs should have freckles but why not!

I mounted the wood nymphs on some die cut shapes (spellbinders & x-cut), cut from core’dinations ‘Core Couture’ card (I used Collal 3D glue gel to give a bit of dimension).  I was drawn to slightly Halloween colours, greens, purples and oranges but that wasn’t even planned it just happened. 
Then came the dilemma of what to do with my wood nymphs!  I thought about bunting or a wishing tree table decoration that could be used for a birthday celebration but then I noticed that the competition called for a card.  So thinking cap on, I hope you like what I came up with.  It’s a bit of a mega birthday card.  It’s made from A3 centura pearl card and re-enforced with an old box because of the size.  As there was a lot of effort in the colouring in (as well as the fun) I wanted something that would have a longer life, so my tags are attached with just a little bit of foam tape so that they can be recycled back in to birthday decorations for future birthdays.  This made me think that it might be a sweet idea to make a new tag for a child every birthday so that they could have an every growing string of bunting and you could write a little message or memory on the back (as number one son will be thirty on his next birthday I think I may have had this bright idea a little late!).

Extras used: Hunkydory/Crafter’s Companion foiled acetate with leaves (part of Toread range); papermania brads and glitter strips; purple, orange and green matt card from stash; sticky letters from stash (TPC Studio); paper shapers flower punch; fuzzy wool and little pegs from stash (from bargain shop).